

Facilities
Facilities are the physical locations—such as terminals, refineries, and gathering stations—where truck loads, pipeline readings, and transfers are measured and processed. In Coyote, facilities serve as the primary structural context for your assets, meters, bays, and transaction tracking.
Open Admin → Facilities in the app (/facilities).
Actions
| Action | Description |
|---|---|
| Add Facility | Create a new facility profile (requires Admin create permissions) |
| Row Selection | Click a specific facility row to open its detailed configuration, assigned meters, and bay settings |
Where to go in the app
Step 1 — Navigate to the facilities page
- In the primary sidebar, navigate to the Admin section.
- Click Facilities.
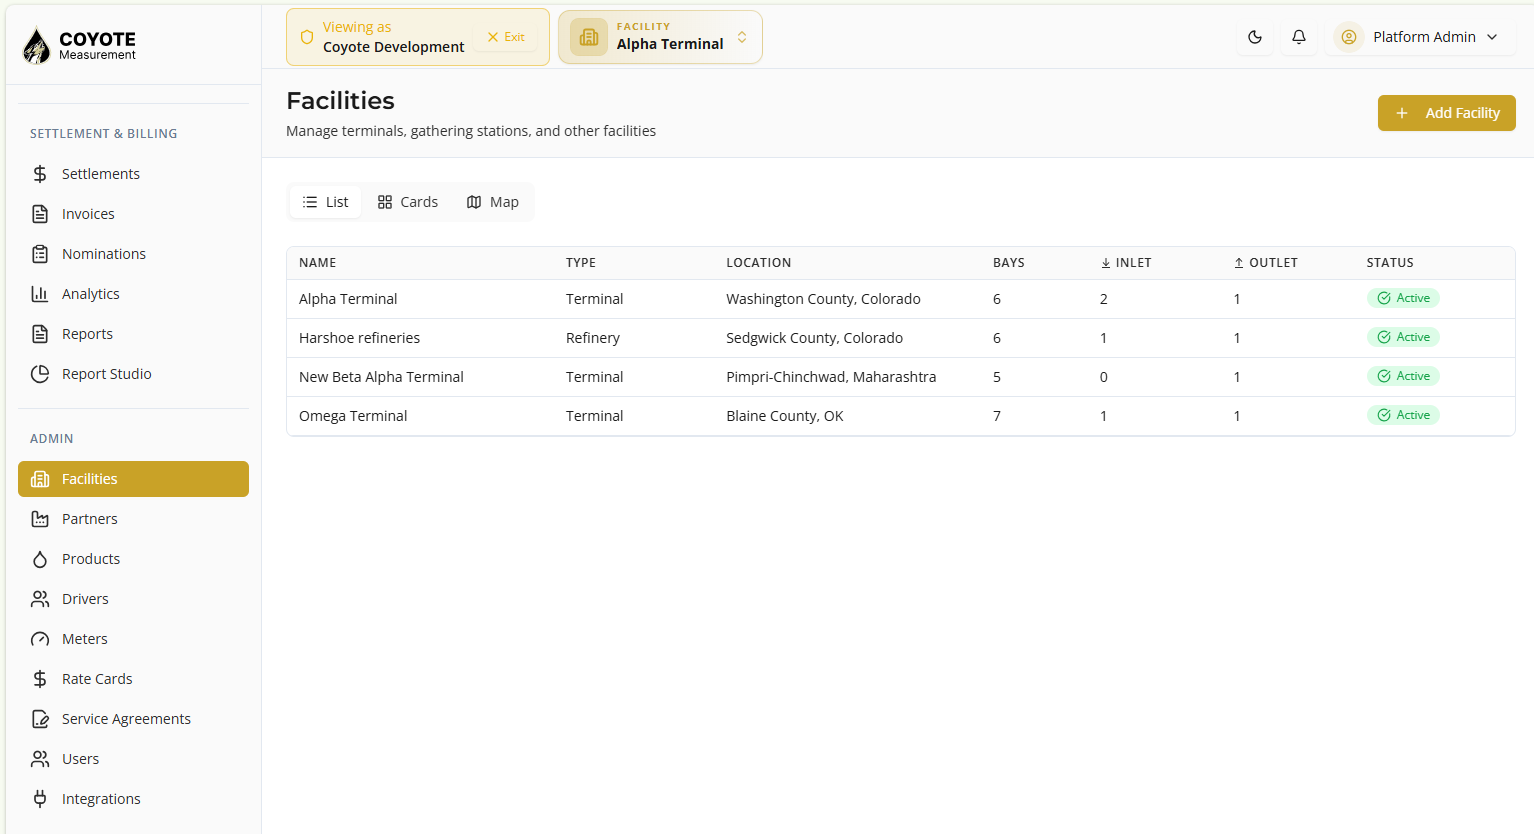
- The facilities list appears with all facilities, their type, location, bay count, inlet, outlet and status.
Columns
| Column | Description |
|---|---|
| Name | The name of the facility (e.g., Alpha Terminal) |
| Type | Facility classification (Terminal, Refinery, Gathering Station, etc.) |
| Location | Geographical area or county/state jurisdiction |
| Bays | Number of active transfer bays equipped at the location |
| Inlet | Number of configured inlet pipelines or points |
| Outlet | Number of configured outlet pipelines or points |
| Status | Operational state (Active or Inactive) |
Filters & Views
| Control | Use for |
|---|---|
| List / Cards / Map | Toggle between a data table, visual summary cards, or a geographic map view |
| Search | Filter facilities by name or specific location attributes |
| Facility Context | Switch the active facility in the global app header to filter all operational pages to that terminal |
Step 2 — Create a new facility
- Click Add Facility in the top right.
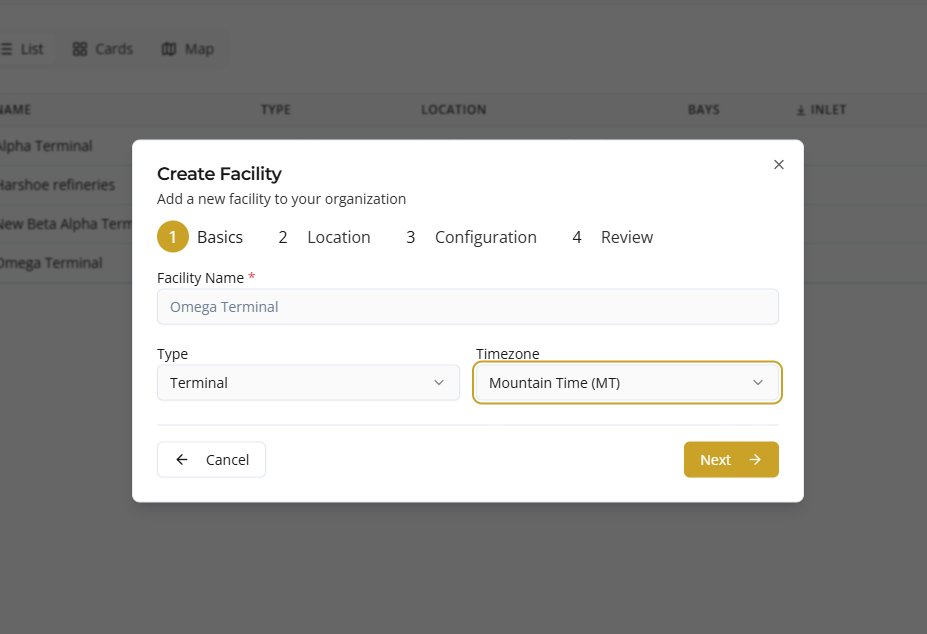
- The create facility provisioning wizard opens with 4 steps basics, location, configuration and review.
- In Basics, enter the facility name.
- Select the type (Terminal, Tank Farm, Refinery,Loading Rack, Pipeline Station or Storage Facility) and timezone.
- Click Next to move the next step.
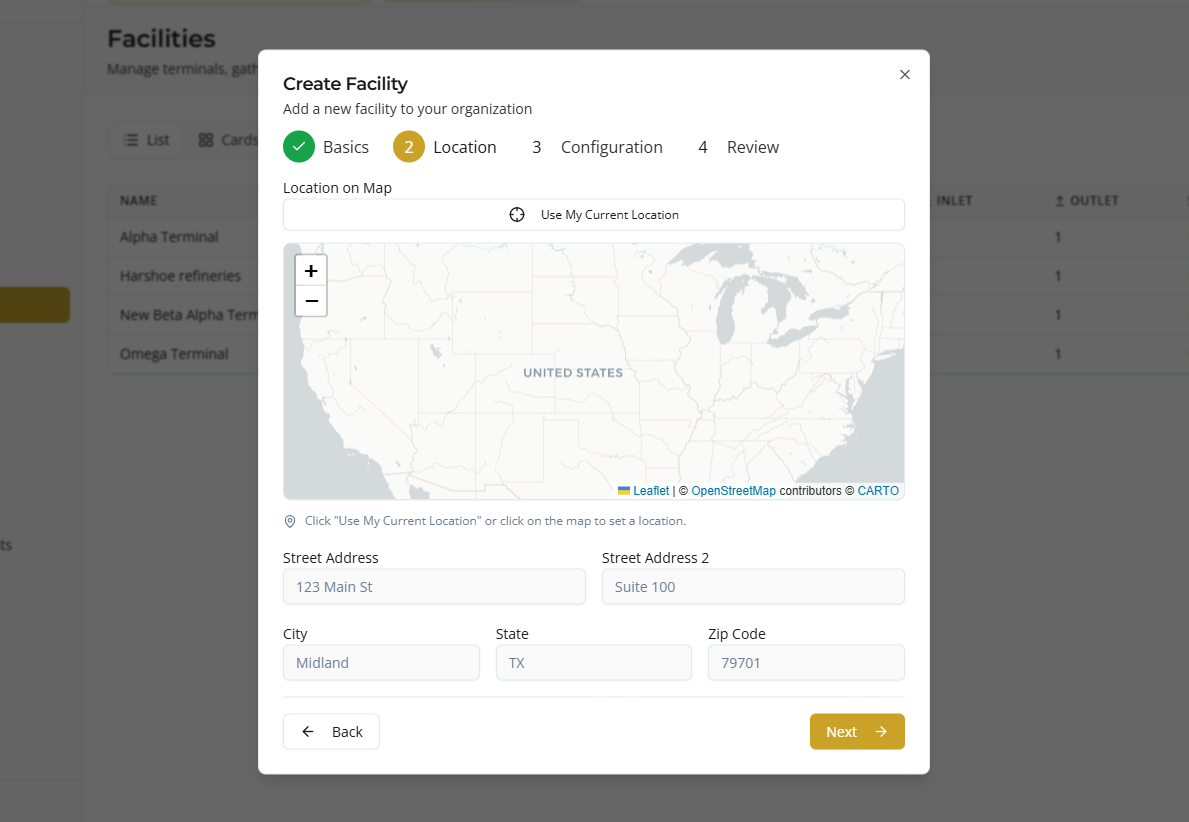
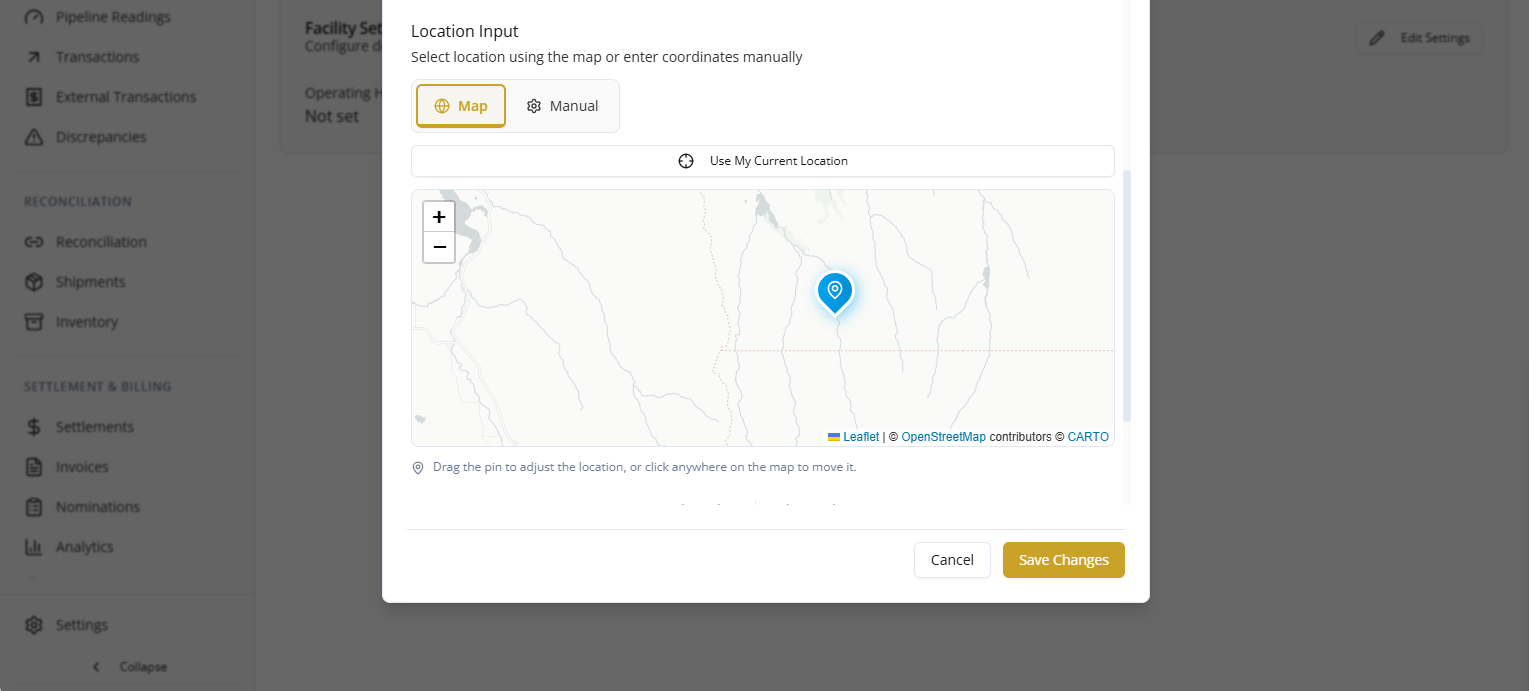
- In Location, click “Use My Current Location” or click on the map to set a location.
- Enter the street address, street address 2, city, state, zipcode.
- Click Next to move the next step.
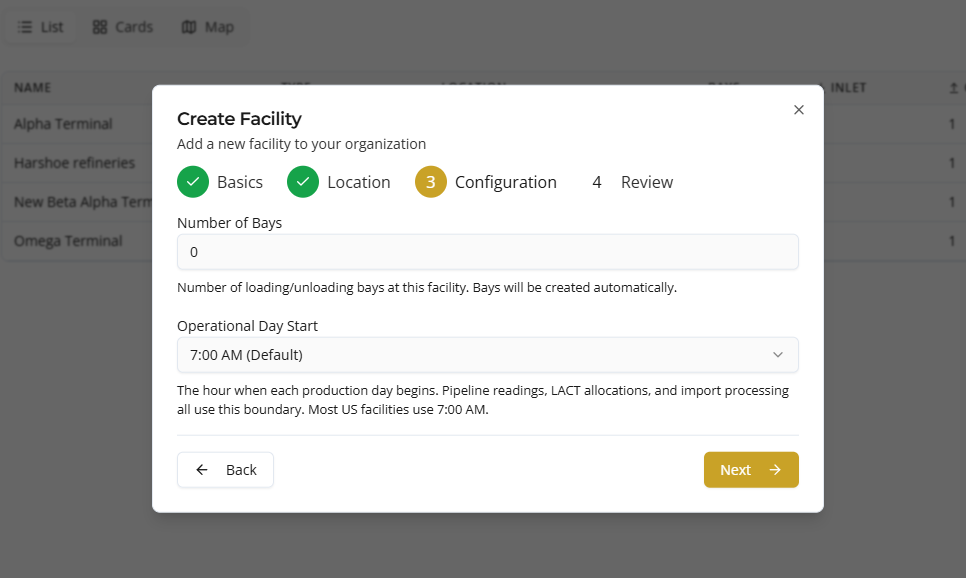
- In Configuration tab, enter no of bays, and bays will be created automatically.
- Select the Operational Day Start (12:00 AM (Midnight), 06:00 AM, 07:00 AM (Default), 08:00 AM).
- Click Next to move the next step.
- Review the details and facility created successfully.
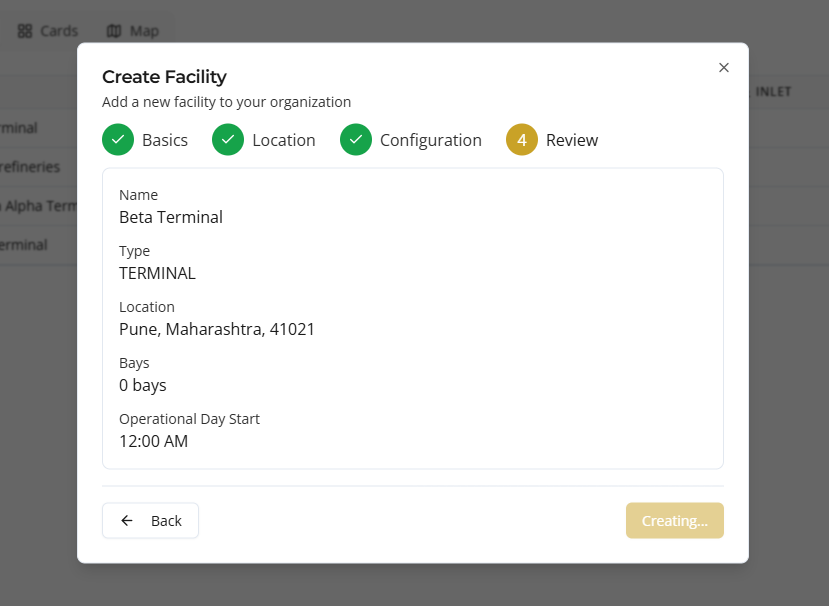
Step 3 — View Facility and further operations
- From the facility list, click the facility row or name to open its detail page.
- Overview, Bays with Count, Pipelines with Count and Settings 4 tabs appears.
- Overview contains facility information, Location and Quick Stats with counts (for Bays, Active Bays, Transactions Today and Volume Today).
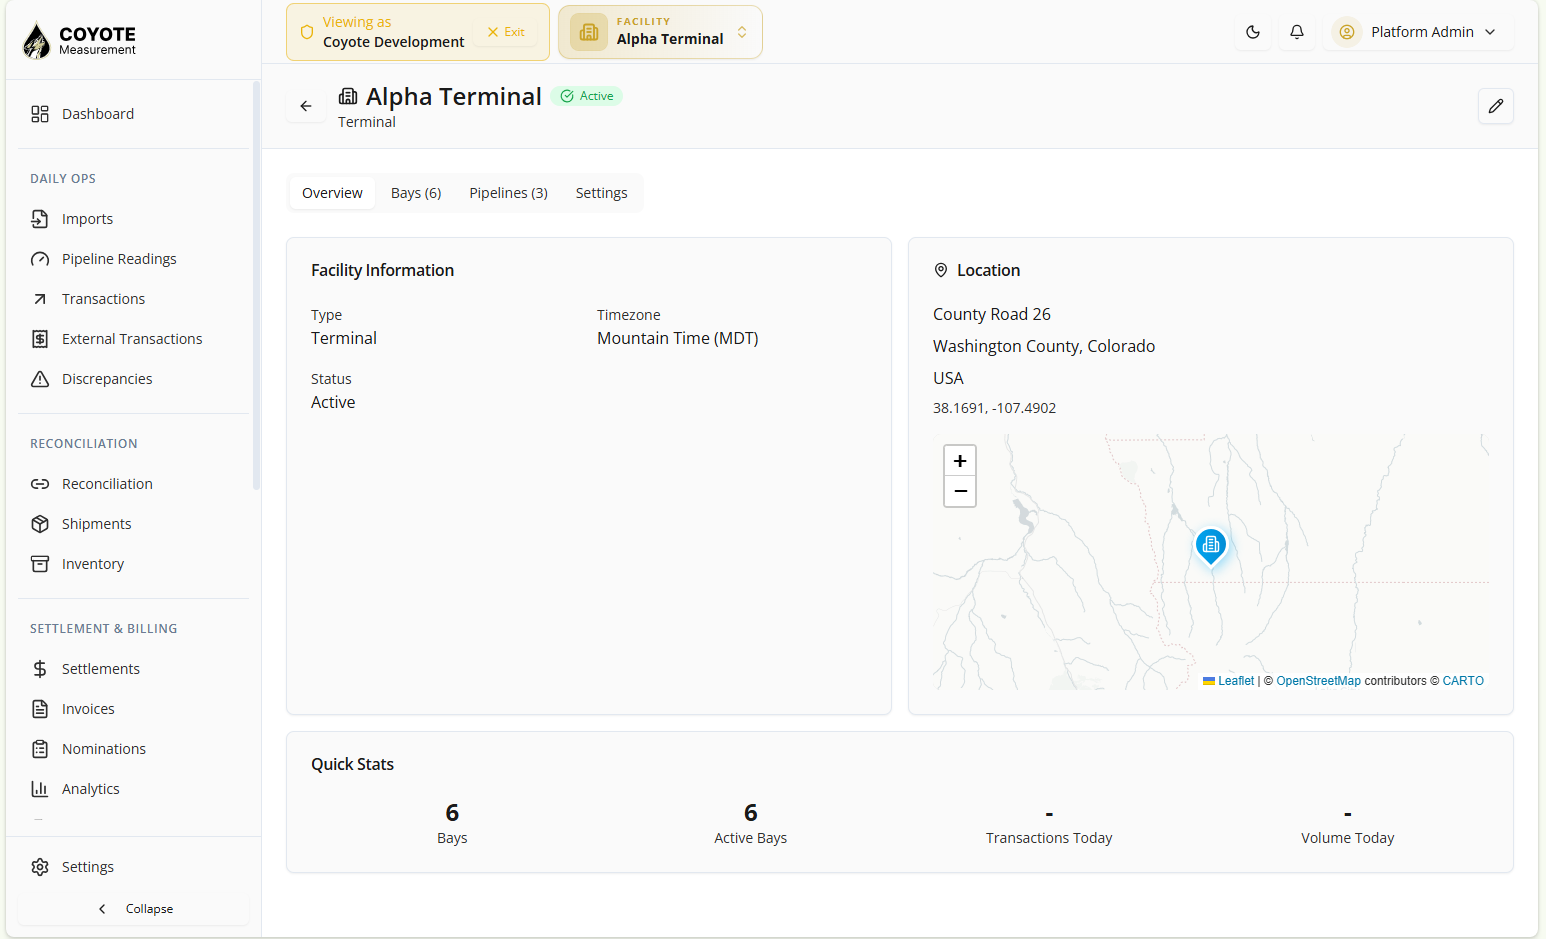
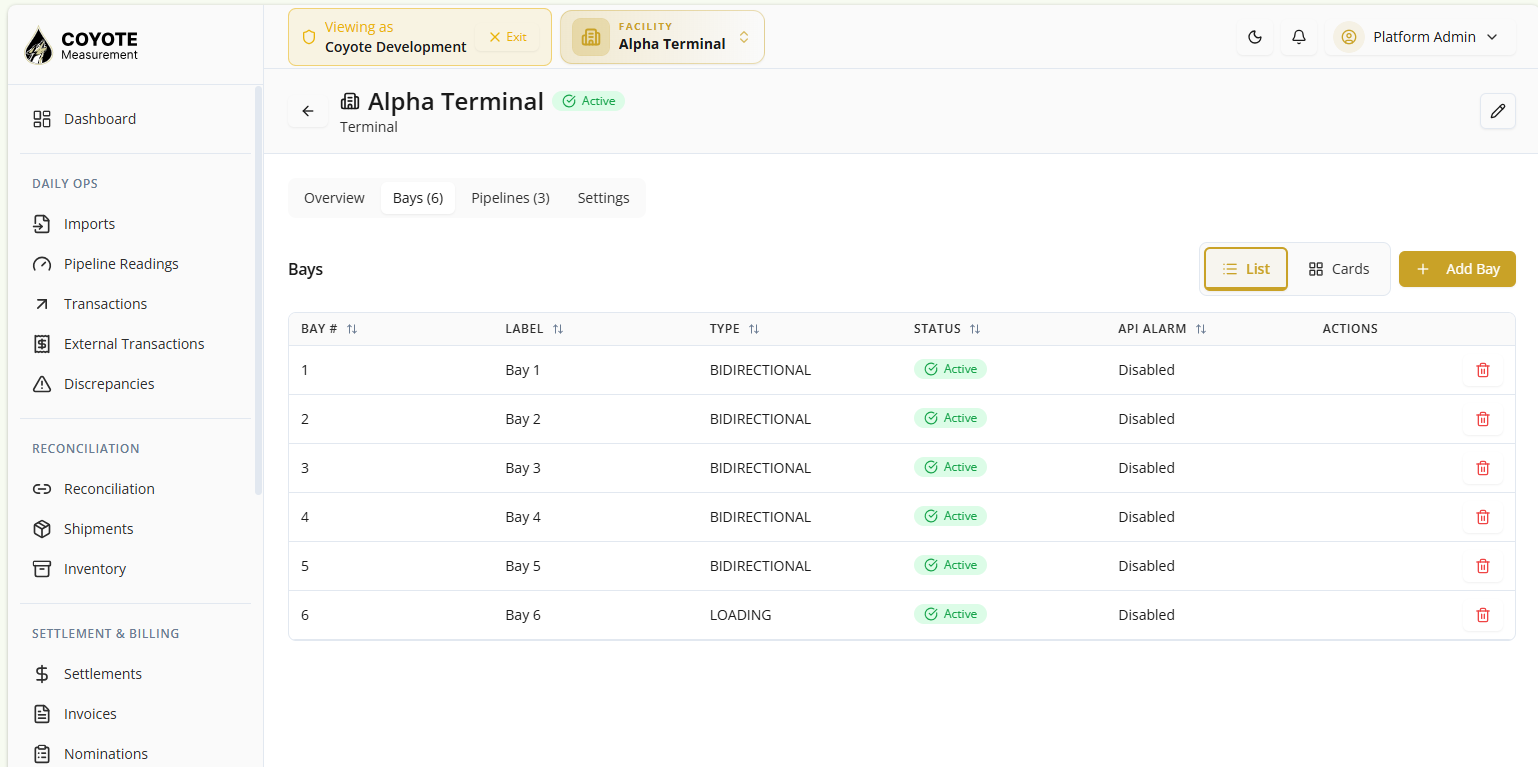
Bays Management
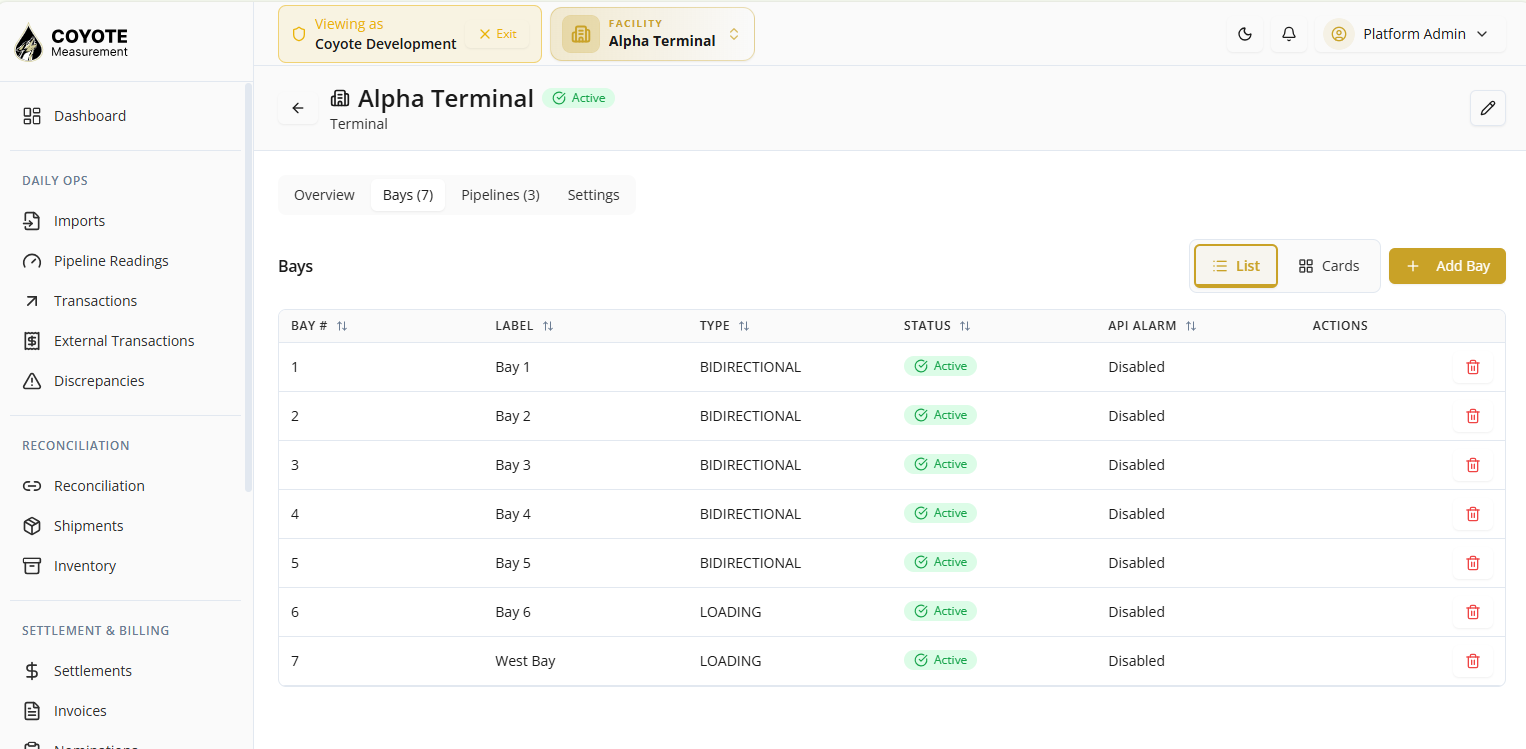
- Click on Bays Tab, list and card view appears with bay, label, type, status and API alarm.
- In actions on click of trash icon, user can delete the bay.
- Click on Add Bay in right corner and add bay provisioning wizard opens.
- Enter bay number and label.
- Select the Type (Loading, Unloading, Bidirectional)
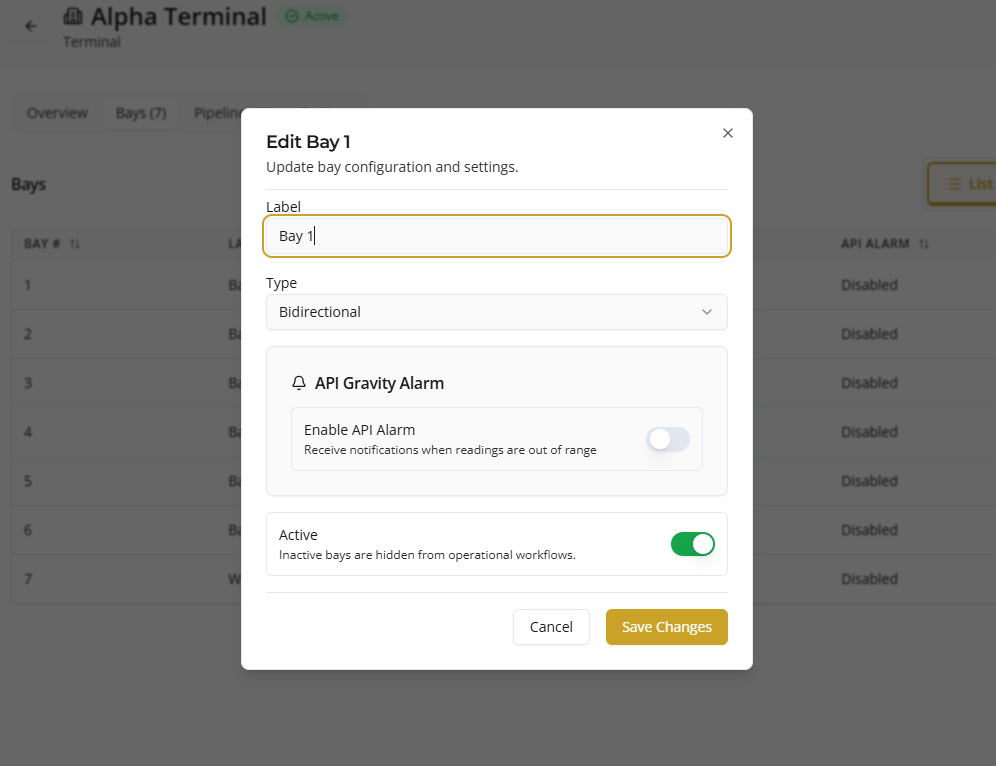
- Enable API Gravity Alarm if want to Receive notifications when readings are out of range.
- Click on Add Bay to submit.
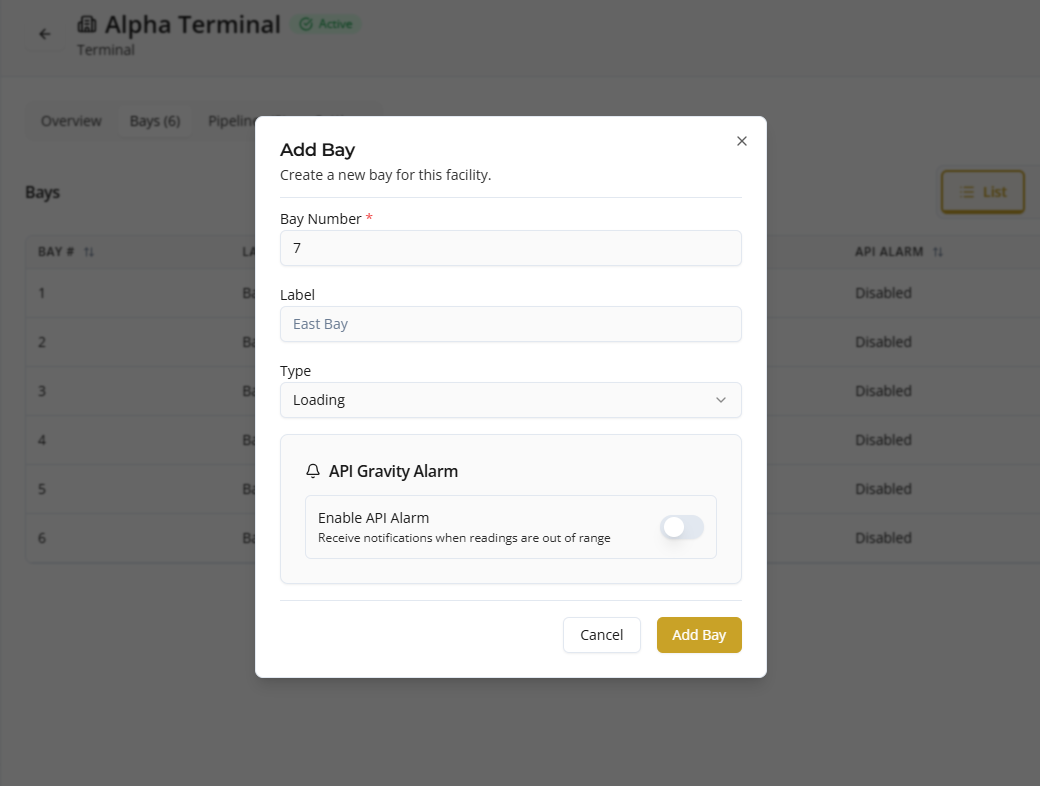
- Bay added successfully and seen in list.
- To edit the bay click on row or name to open its wizard.
Pipelines Management
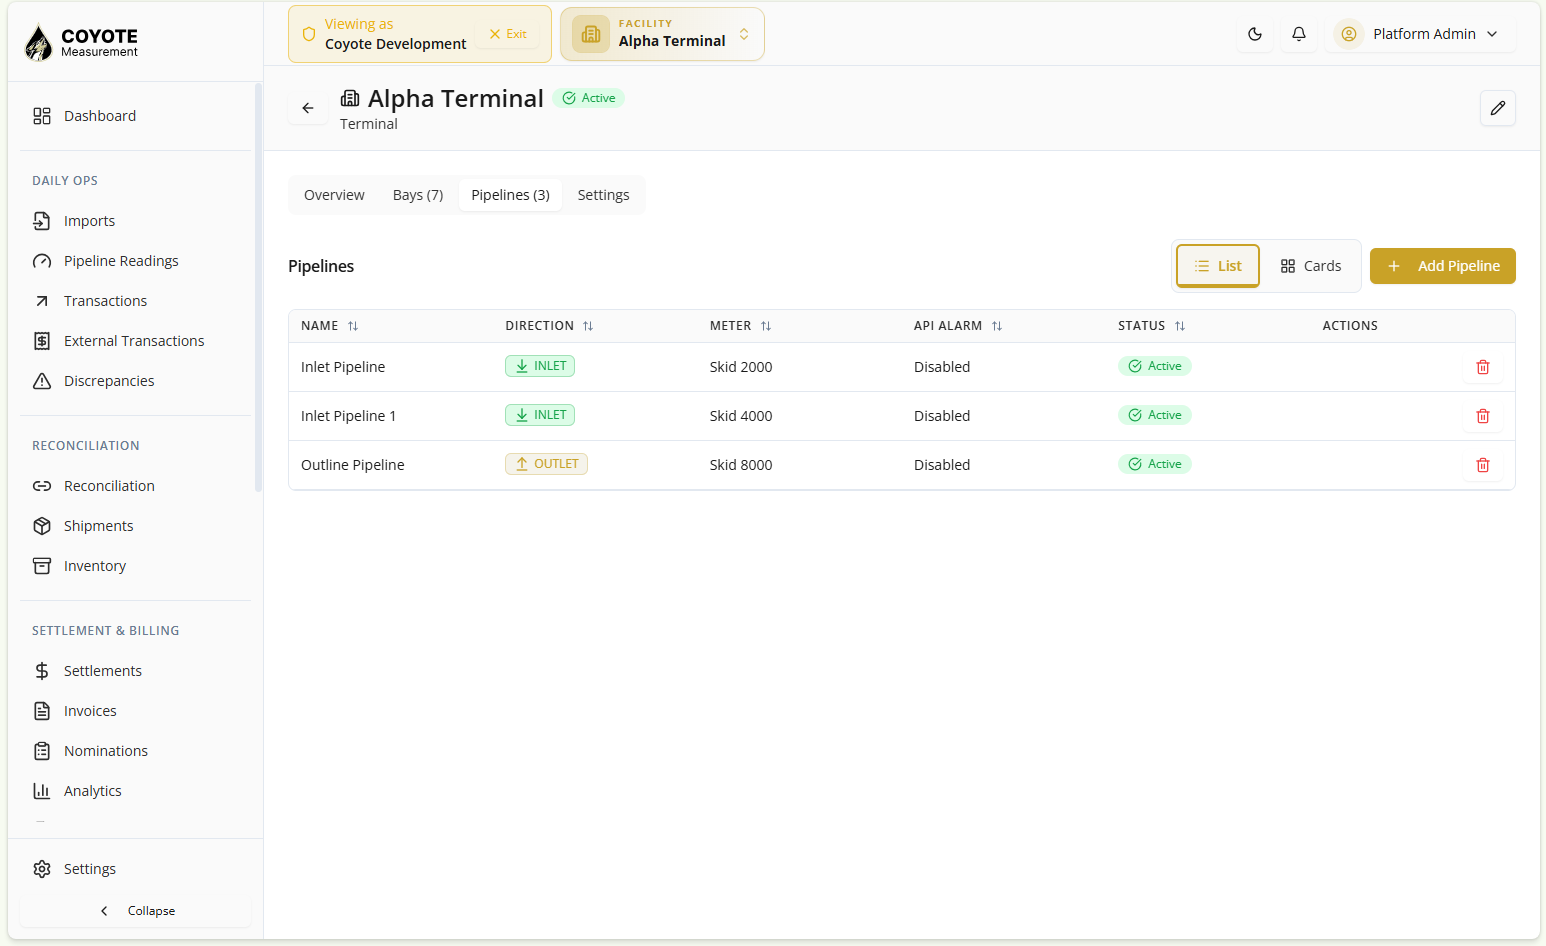
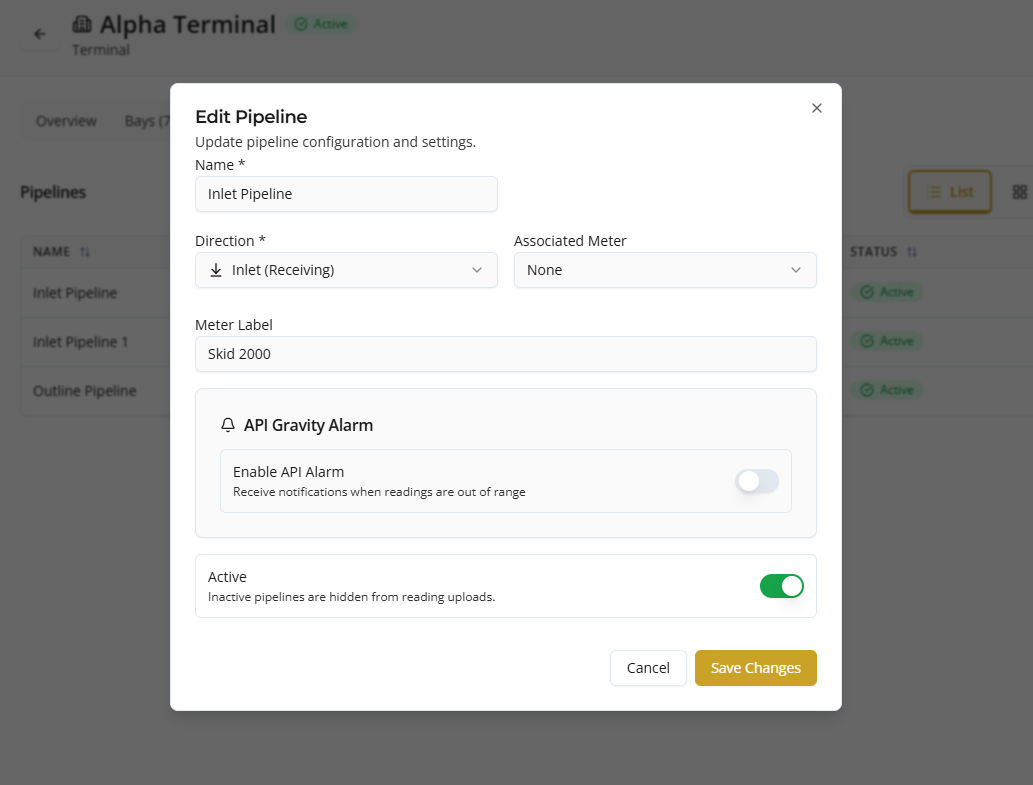
- Click on pipelines Tab, list and card view appears with name, direction, meter, status and API alarm.
- In actions on click of trash icon, user can delete the bay.
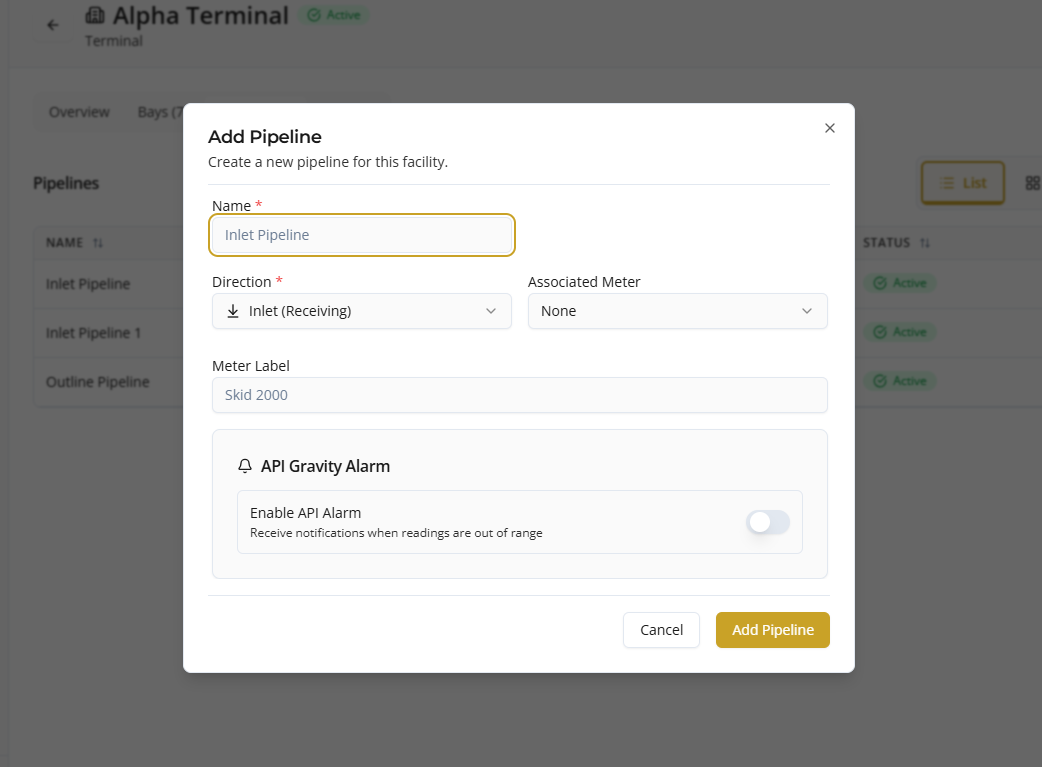
- Click on Add Pipeline in right corner and add pipeline provisioning wizard opens.
- Enter name and meter label.
- Select the Direction (Inlet (Receiving), Outlet (Delivery)) and Associated Meter.
- Enable API Gravity Alarm if want to Receive notifications when readings are out of range.
- Click on Add Pipeline to submit.
- Pipeline added successfully and seen in list.
- To edit the pipeline click on row or name to open its wizard.
Settings
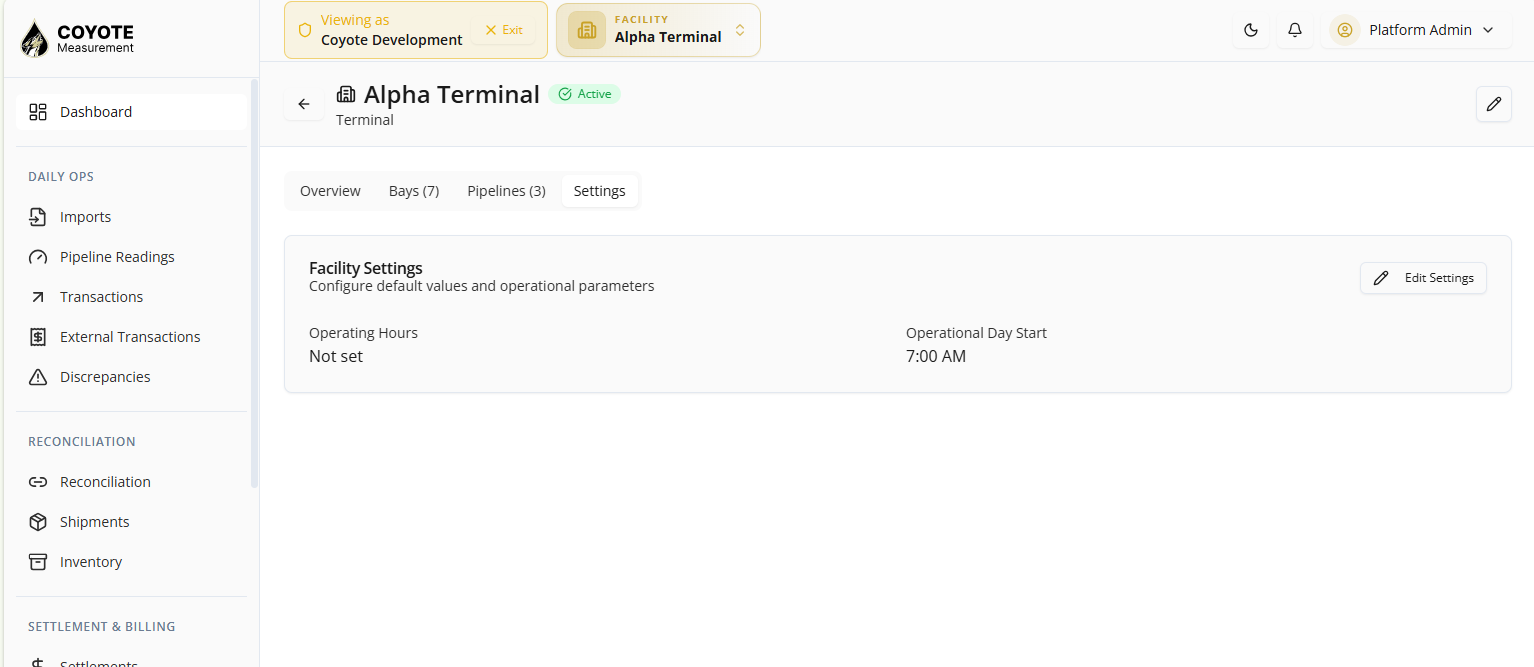
- In settings tab, Facility Settings seen with Operational Hours and Operational Day Start.
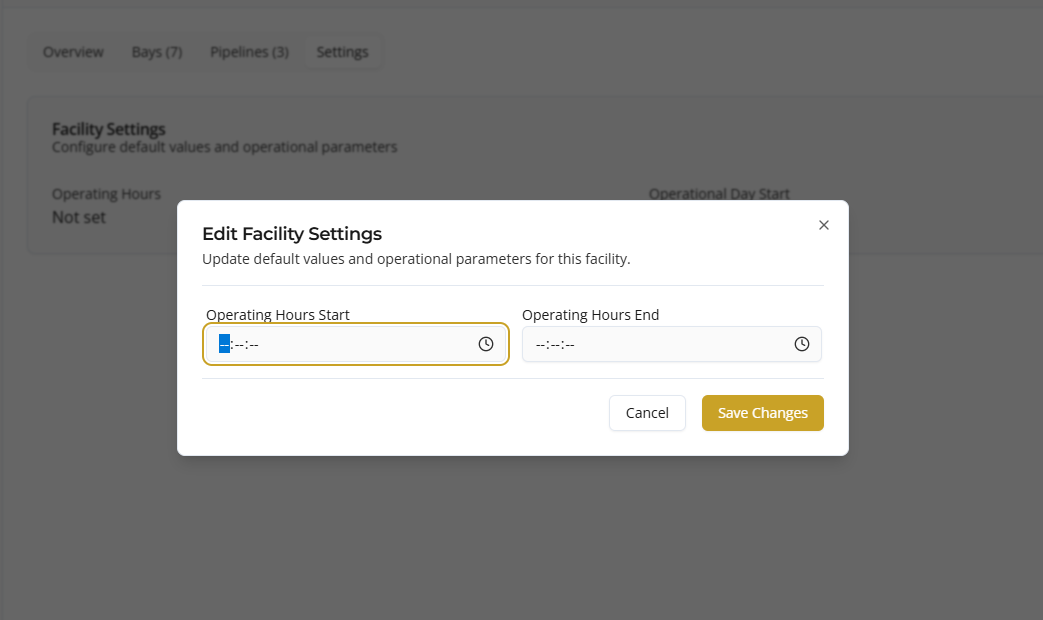
- On Edit Settings update Operational Hours Start and Operational Hours End.
- Click Save Changes.
Step 4 — Edit Facility
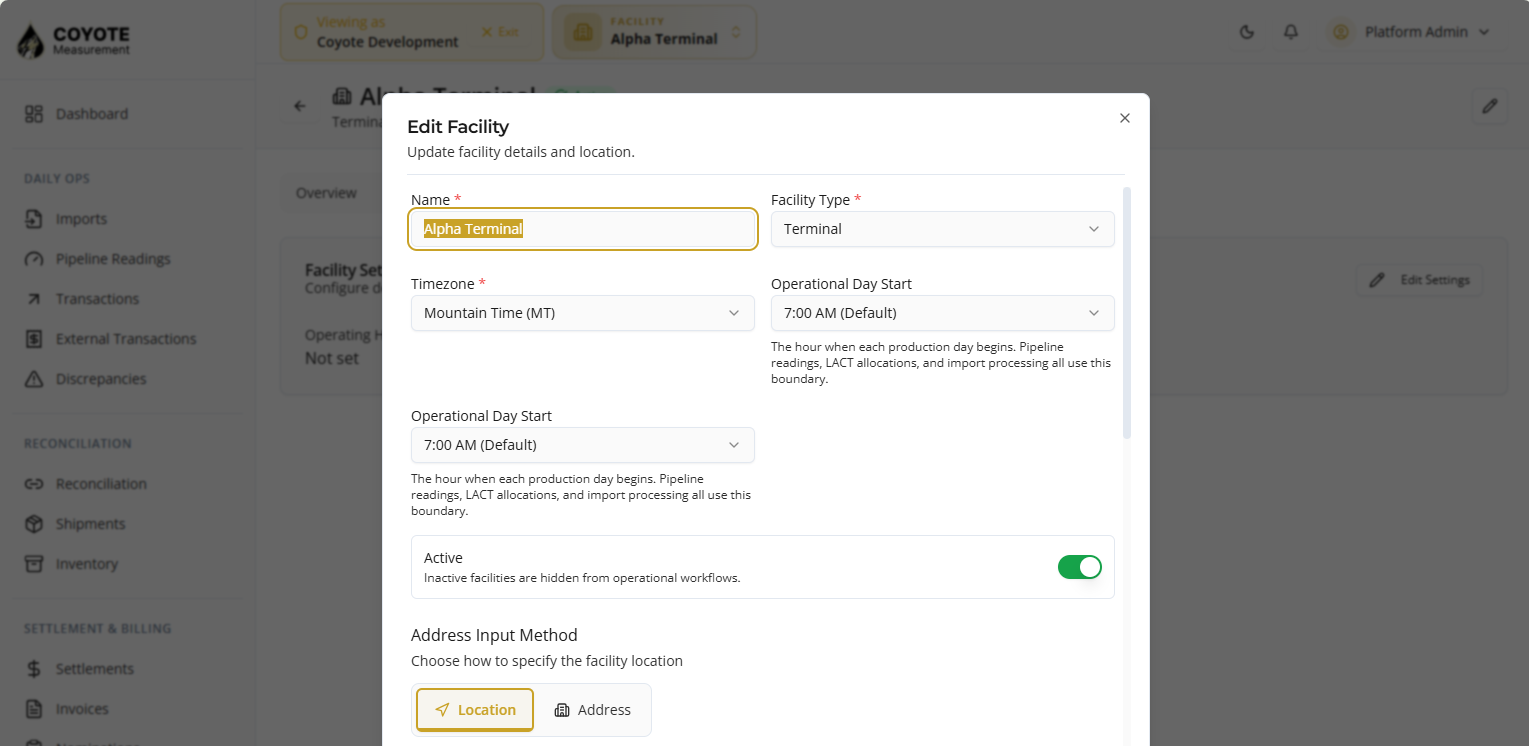
- In facility detail page, click edit icon in right corner.
- Edit the fields if needed.
- Click Save Changes to update.
Permissions
| Action | Permission |
|---|---|
| View list / profiles | admin:facilities:list |
| View detail configuration | admin:facilities:view |
| Create new facility | admin:facilities:create |
| Update parameters / bays | admin:facilities:update |
Your role must also include access to the facility shown in the app header.
End-to-end flow
flowchart TD A[Select facility] --> B[Upload files] B --> C[Auto-detect type, bay, and date] C --> D[Confirm mappings and production day] D --> E[Process import session] E --> F[Review and validate rows] F --> G{Blocking issues?} G -->|Yes| H[Fix rows, mappings, cross-bay, LACT] H --> F G -->|No| I[Approve session] I --> J[Live transactions and readings] J --> K[Reports, ledger, and reconciliation]